Table of Contents
Customizing the Notarization Workflow
[TOC]
Notarize your app from the command line to handle special distribution cases.
Overview
The easiest way to notarize your app is through the Xcode user interface, as described in Notarizing macOS Software Before Distribution. However, if you have a more complex scenario, you can use command line tools to manually notarize your app. This workflow can be useful in a number of cases, like when you need to:
- Notarize software you’ve already shipped.
- Notarize plug-ins for other software packages.
- Create complex distributions, like disk images or installer packages.
- Add the notarization process to a scripted build environment.
Export a Package for Notarization
To prepare an app for notarization, you must export the app from Xcode. Using the Xcode interface, you automatically export your app when you click Distribute App in the Organizer window. But in a scripted build environment, you must use the xcodebuild utility to perform the export. Because export directly follows archiving, the archive’s post-action script is a convenient place from which to perform the export. You can edit the post-action from the scheme editor in Xcode.

The script begins by exporting the archive with xcodebuild:
EXPORT_PATH="$TEMP_DIR/Export"
/usr/bin/xcodebuild -exportArchive -archivePath "$ARCHIVE_PATH" -exportOptionsPlist "$SRCROOT/ExportOptions.plist" -exportPath "$EXPORT_PATH"
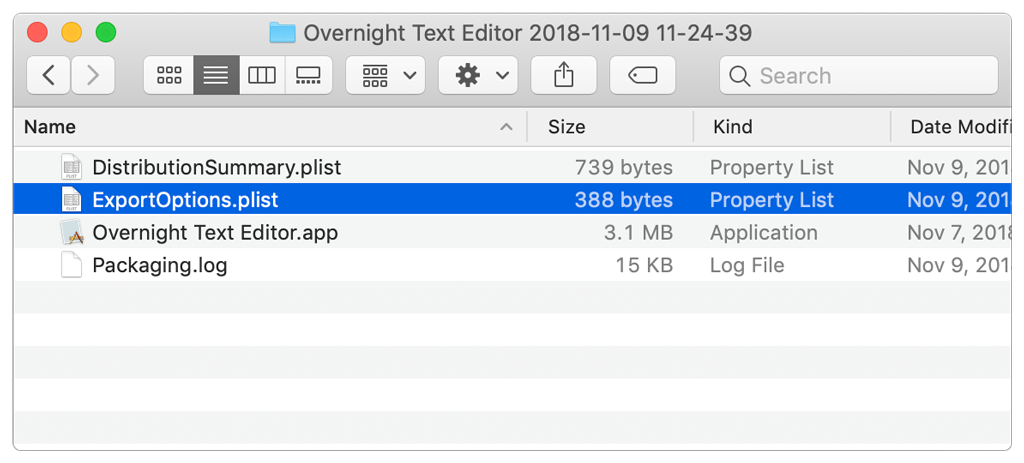
You tell xcodebuild which archive to export using an environment variable automatically defined by Xcode, and provide a location for the output by defining the EXPORT_PATH variable. Use the exportOptionsPlist flag to indicate an options property list that configures the export operation. You typically obtain this file by exporting from Xcode just once. The export options file appears alongside the app itself in the export directory:
Alternatively, you can create a custom export options property list file with a text or property list editor. For a complete description of the available keys, use the help flag:
$ xcodebuild -help
Because you can’t upload the .app bundle directly to the notary service, you’ll need to create a compressed archive containing the app:
APP_PATH="$EXPORT_PATH/$PRODUCT_NAME.app"
ZIP_PATH="$EXPORT_PATH/$PRODUCT_NAME.zip"

# Create a ZIP archive suitable for altool.
/usr/bin/ditto -c -k --keepParent "$APP_PATH" "$ZIP_PATH"

# As a convenience, open the export folder in Finder.
/usr/bin/open "$EXPORT_PATH"
Alternatively, you can put apps, kernel extensions, and other software in a container, like a disk image, and notarize the container. The notary service accepts disk images (UDIF format), signed flat installer packages, and ZIP archives. It processes nested containers as well, like packages inside a disk image.
Important
If you distribute your software via a custom third-party installer, you need two rounds of notarization. First you notarize the installer’s payload (everything the installer will install). You then package the notarized (and stapled, as described in Staple the Ticket to Your Distribution) items into the installer and notarize it as you would any other executable. If you use a network installer, separately notarize both the installer and the items it downloads.
Upload Your App to the Notarization Service
You upload your app for notarization using altool. Xcode 10 or later supports notarization, so if you have more than one version of Xcode installed on your Mac, be sure to use the xcode-select utility to choose the appropriate version:
$ sudo xcode-select -s /path/to/Xcode10.app
You can then use xcrun to invoke the altool command with the notarize-app flag:
$ xcrun altool --notarize-app
               --primary-bundle-id "com.example.ote.zip"
               --username "AC_USERNAME"
               --password "@keychain:AC_PASSWORD"
               --asc-provider <ProviderShortname>
               --file OvernightTextEditor_11.6.8.zip
The notary service generates a ticket for the top-level file that you specify, as well as each nested file. For example, if you submit a disk image that contains a signed installer package with an app bundle inside, the notarization service generates tickets for the disk image, installer package, and app bundle.
Include the primary-bundle-id flag—which is required—to specify an identifier that helps you keep track of automated correspondence from the notarization service. The value you give doesn’t need to match the bundle identifier of the submitted app or have any particular value. It only needs to make sense to you. The notarization service includes the value whenever it emails you regarding the given altool submission.
Add the username and password flags to supply your App Store Connect credentials. Because App Store Connect now requires two-factor authentication (2FA) on all accounts, you must create an app-specific password for altool, as described in Using app-specific passwords.
To avoid including your password as cleartext in a script, you can provide a reference to a keychain item, as shown in the previous example. This assumes the keychain holds a keychain item named AC_PASSWORD with an account value matching the username AC_USERNAME. Starting in Xcode 11, you can add a new keychain item for this purpose from the command line using the altool utility:
$ xcrun altool --store-password-in-keychain-item "AC_PASSWORD"
               -u "AC_USERNAME"
               -p <secret_password>
You can omit the asc-provider flag for the notarization call if your credentials are associated with only a single team. Otherwise, use the flag to indicate the provider short name for the appropriate team. Starting in Xcode 11, you can use altool to get a table of providers, provider short names, and team IDs associated with a given username and password using the list-providers flag:
$ xcrun altool --list-providers -u "AC_USERNAME" -p "@keychain:AC_PASSWORD"
If notarization succeeds, altool prints a request identifier:
altool[16765:378423] No errors uploading 'OvernightTextEditor_11.6.8.zip'.
RequestUUID = 2EFE2717-52EF-43A5-96DC-0797E4CA1041
Save the RequestUUID to use later when checking the status of your request. For more information about altool and its required flags, use the help flag:
$ xcrun altool --help
Check the Status of Your Request
After uploading your app, the notarization process typically takes less than an hour. When the process completes, you receive an email indicating the outcome. Additionally, you can use altool with the notarization-history flag to inspect the status of all of your notarization requests:
$ xcrun altool --notarization-history 0 -u "AC_USERNAME" -p "@keychain:AC_PASSWORD"
Passing a page value of 0, as in the above example, returns the most recent requests, and prints a table of results:
Notarization History - page 0

Date                      RequestUUID                          Status      Status Code Status Message
------------------------- ------------------------------------ ----------- ----------- ----------------
2018-07-02 20:32:01 +0000 2EFE2717-52EF-43A5-96DC-0797E4CA1041 invalid     2           Package Invalid
2018-06-29 13:23:13 +0000 6D020E28-9890-48E5-851C-4275169D07CC invalid     2           Package Invalid
To obtain detailed information about a particular submission, use altool along with the notarization-info flag and the UUID for the submission or from the history table above:
$ xcrun altool --notarization-info 2EFE2717-52EF-43A5-96DC-0797E4CA1041 -u "AC_USERNAME"
Among other details, the tool reports a log file URL that you can use to download a JSON-formatted log file:
   RequestUUID: 2EFE2717-52EF-43A5-96DC-0797E4CA1041
          Date: 2018-07-02 20:32:01 +0000
        Status: invalid
    LogFileURL: https://osxapps.itunes.apple.com/...
   Status Code: 2
Status Message: Package Invalid
The log file enumerates any issues that notarization found.
{
    "archiveFilename": "Overnight TextEditor.app",
    "issues": [
        {
            "message": "The signature of the binary is invalid.",
            "path": "Overnight TextEditor.app/Contents/MacOS/Overnight TextEditor",
            "severity": "error"
        }
    ],
    "jobId": "2EFE2717-52EF-43A5-96DC-0797E4CA1041",
    "logFormatVersion": 1,
    "status": "Invalid",
    "statusSummary": "Archive contains critical validation errors",
    "ticketContents": null,
    "uploadDate": "2018-07-02T20:32:01Z"
}
Note
Always check the log file, even if notarization succeeds, because it might contain warnings that you can fix prior to your next submission.
For information about how to deal with common problems, see Resolving Common Notarization Issues.
Staple the Ticket to Your Distribution
Notarization produces a ticket that tells Gatekeeper that your app is notarized. After notarization completes successfully, the next time any user attempts to run your app on macOS 10.14 or later, Gatekeeper finds the ticket online. This includes users who downloaded your app before notarization.
You should also attach the ticket to your software using the stapler tool, so that future distributions include the ticket. This ensures that Gatekeeper can find the ticket even when a network connection isn’t available. To attach a ticket to your app, use the stapler tool:
$ xcrun stapler staple "Overnight TextEditor.app"
While you can notarize a ZIP archive, you can’t staple to it directly. Instead, run stapleragainst each individual item that you originally added to the archive. Then create a new ZIP file containing the stapled items for distribution. Although tickets are created for standalone binaries, it’s not currently possible to staple tickets to them.
Ensure Your Build Server Has Network Access
To incorporate notarization into a custom workflow, your build server needs access to certain network resources.
In particular, because altool is a front end for the Transporter command line tool, it uses the same IP address ranges and ports as that tool. See System and network requirements in the Transporter User Guide for details.
In addition, stapler uses CloudKit to download tickets, which requires access to the following IP address ranges, all on port 443:
17.248.128.0/18
17.250.64.0/18
17.248.192.0/19
Topics
Xcode Archives
Customizing the Xcode Archive Process
Archive, export, and notarize your app in one step using Xcode post-action build scripts.
See Also
Notarization
Resolving Common Notarization Issues
Handle common problems reported in the notarization log file, or that arise during ticket stapling.